

Sadness is one of the most memorable characters from Pixar's Inside Out, and now you can make your very own amigurumi Sadness doll! She's quiet, gloomy, and often sees the downside of things, but she's also a reminder that sadness is an important part of life and that it's okay to feel our feelings.
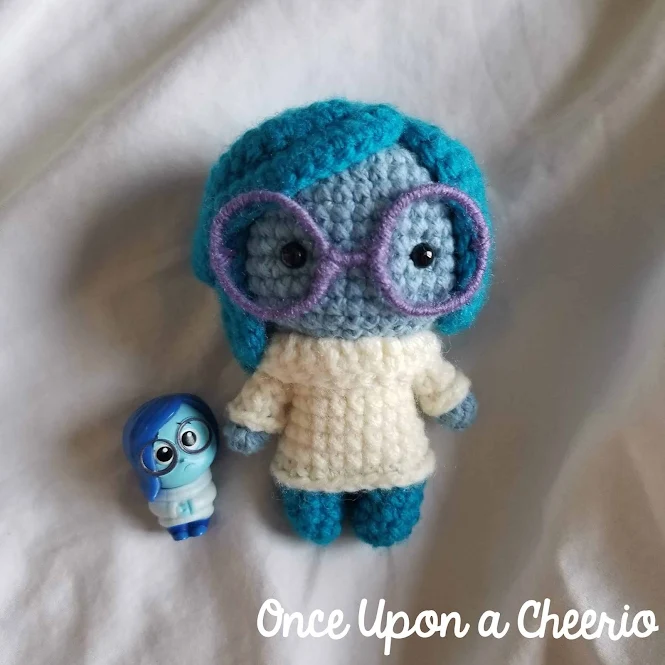
This adorable Sadness amigurumi doll was actually the first Inside Out character I crocheted. With her signature blue hair, oversized glasses, and cozy turtleneck sweater, she's instantly recognizable and surprisingly fun to crochet. Whether you're making her for yourself, a fellow Inside Out fan, or as part of the complete emotion collection, this free crochet pattern is a fun way to bring a little piece of the movie to life.
If you're collecting all the emotions, be sure to check out my other free Inside Out crochet patterns too. Together, they make a colorful set that's perfect for display, imaginative play, or helping little ones recognize and talk about their feelings.
What You Need / Materials
This post contains affiliate links. Purchasing items through these links will not incur any additional costs for you. Please refer to our disclosure policy for more information.
- Worsted (weight #4) yarn in the following colors:
- Light Sky Blue (I used Bernat Handicrafter Cotton Yarn in French Blue)
- Bright Blue (I used Loops and Threads Impeccable in Clear Blue)
- Off-white (I used Loops and Threads Impeccable in Aran)
- Eyeglasses:
- Jewelry Wire for the eyeglasses
- Wire cutters
- Something round to shape the glasses (e.g., glue sticks)
- Purple Yarn (I used Red Heart With Love in Violet)
- 3.0 mm crochet hook
- 6.0 mm safety eyes
- Polyester stuffing of your choice
- Yarn needle
- Stitch markers
- Scissors
Yarns Substitutions
- Bernat Handicrafter (100% cotton; 80 yards / 73 m per 1.76 oz. / 50 g skein)
- Bernat Super Value (100% acrylic; 440 yards / 402 m per 6.95 oz. / 197 g skein)
- Red Heart Super Saver (100% acrylic; 364 yards / 333 m per 6.98 oz. / 198 g skein)
- Hobbii Friends Cotton 8/8 (100% cotton; 82 yards / 75 m per 1.76 oz. / 50 g skein)
- Loops and Threads Impeccable (100% acrylic; 285 yards / 261 m per 4.48 oz. / 127 g skein)
Finished Size
- Finished amigurumi measures approximately 12 cm (4.7 inches) in height.
- Consider using a different yarn weight or category, and the appropriate hook size to make this project larger or smaller.
Level of Difficulty
- ★★☆☆☆ Beginner / Easy
- Requires familiarity with stitches used (below), attaching plastic safety eyes, changing yarn colors, and basic sewing and embroidery skills.

Stitches & Abbreviations
- st/sts - stitch/stitches
- ch - chain
- slst - slip stitch
- sc - single crochet (using the yarn under method)
- sc-inc - single crochet increase, 2 single crochets in one stitch
- sc-dec - single crochet decrease, single crochet 2 stitches together
- hdc - half double crochet
- dc - double crochet
Pattern Notes
- This pattern is written using US crochet terms.
- Complete the pieces in the specified order to ensure proper assembly later.
- I used the underside of the amigurumi hairpiece as the visible side, allowing the strands to naturally curl towards the face.
- Use the yarn under single crochet technique to achieve tighter, more aligned stitches.
- Learn how to seamlessly change color in crochet mid-row or round to create clean color transitions.
- Crochet in continuous spiral rounds. Do not join at the end of each round unless otherwise stated.
- Use a running stitch marker to keep your place when crocheting in rounds.
- Use the ultimate finish to neatly close up your amigurumi pieces.
- Use the invisible fasten-off method to create a smooth, knot-free edge that blends perfectly with your stitches.
- Optional: Use the invisible increase and invisible decrease to enhance the appearance of your amigurumi.
Amigurumi Sadness Crochet Pattern
Head
Using a 3.0 mm crochet hook with light sky blue yarn...
Round 1: Magic Circle with a base of 6 sc (6 sts)
Round 2: Sc-inc in each st around (12 sts)
Round 3: [Sc, sc-inc] x 6 times (18 sts)
Round 4: [Sc, sc-inc, sc] x 6 times (24 sts)
Round 5: [3 sc, sc-inc] x 6 times (30 sts)
Round 6: [2 sc, sc-inc, 2 sc] x 6 times (36 sts)
Round 7: [5 sc, sc-inc] x 6 times (42 sts)
Round 8-14: Sc in each st around (42 sts)
Round 15: [5 sc, sc-dec] x 6 times (36 sts)
Round 16: [2 sc, sc-dec, 2 sc] x 6 times (30 sts)
Round 17: [3 sc, sc-dec] x 6 times (24 sts)
Put in your safety eyes. I put mine between rows 10 and 11, about 7 stitches apart. Stuff the amigurumi doll head with polyester stuffing as you decrease.
Round 18: [Sc, sc-dec, sc] x 6 times (18 sts)
Round 19: [Sc, sc-dec] x 6 times (12 sts)
Hairpiece / Wig
Using a 3.0 mm crochet hook with bright blue yarn...
Round 1: Magic Circle with a base of 6 sc (6 sts)
Round 2: Sc-inc in each st around (12 sts)
Round 3: [Sc, sc-inc] x 6 times (18 sts)
Round 4: [Sc, sc-inc, sc] x 6 times (24 sts)
Strand 1: Ch 12, sc into the 2nd ch from the hook and up the ch, then slst into the next st on round 4 (11 sts)
Strands 2 and 3 are the long strands that will be swept to the side of Sadness' face.
Strand 2-3: Ch 19, sc into the 2nd ch from the hook and up the ch, then slst into the next st on round 4 (18 sts)
Strand 4-6: Ch 17, hdc into the 3rd ch from the hook and up the ch, skip 1, then slst into the next st on round 4 (15 sts)
Strand 7: Ch 16, hdc into the 3rd ch from the hook and up the ch, skip 1, then slst into the next st on round 4 (14 sts)
Strand 8: Ch 15, hdc into the 3rd ch from the hook and up the ch, skip 1, then slst into the next st on round 4 (13 sts)
Strand 9: Ch 14, hdc into the 3rd ch from the hook and up the ch, skip 1, then slst into the next st on round 4 (12 sts)
Strand 10-13: Ch 13, hdc into the 3rd ch from the hook and up the ch, skip 1, then slst into the next st on round 4 (11 sts)
Strand 14: Ch 12, sc into the 2nd ch from the hook and up the ch, then slst into the next st on round 4 (11 sts)
Cut and fasten off with a long strand to sew the hairpiece onto the head. Alternatively, you can use some heavy-duty glue to fix it to the head.
Arms
Using a 3.0 mm crochet hook with light sky blue...
Round 1: Magic Ring with a base of 6 sc (6 sts)
Round 2: Sc in each st around (6 sts)
Change to off-white yarn...
Round 3-4: Sc in each st around (6 sts)
Cut and fasten off.
Legs and Body
Using a 3.0 mm crochet hook with bright blue yarn...
Round 1: Magic Ring with a base of 6 sc (6 sts)
Round 2: [2 sc, sc-inc] x 2 times (8 sts)
Round 3: Sc in each st around (8 sts)
Cut and fasten off the first leg.
Repeat rounds 1-3 to make a second leg. Do not cut or fasten off; instead, finish off with a Ch 2.
Round 4: Join the second leg with the first leg. 8 sc around the first leg, 2 sc along the ch, 8 sc around the second leg, 2 sc along the other side of the ch (20 sts)
Round 5: 3 sc, sc-inc, 9 sc, sc-inc, 6 sc (22 sts)
Change to off-white yarn...
Round 6-8: Sc in each st around (22 sts)
Round 9: 3 Sc, sc-dec, 9 sc, sc-dec, 6 sc (20 sts)
Round 10: Sc in each st around (20 sts)
Round 11: 4 Sc, 6 sc around the first arm, 10 sc, 6 sc around the second arm, 6 sc (32 sts)
Round 12: 3 Sc, 4 sc-dec, 8 sc, 4 sc-dec, 5 sc (24 sts)
Round 13: Sc in each st around (24 sts)
Round 14: Ch 2, dc in each st around, slst into the first st of the round (24 sts)
Fold the last round of dc over to create the turtleneck, and cut and fasten off with a long tail to sew the head onto the body.
Sweater Ribbing (Optional)
This part is optional, but I found that it made my Sadness amigurumi much more polished.
Ch 7 (make 2), cut and fasten off with a long tail to sew onto each sleeve to create the look of the ribbed sleeves for Sadness' sweater.
Ch 23, cut and fasten off with a long tail to sew onto the bottom of Sadness' sweater to create a cleaner finish.
Assembly
Pin the center of the hairpiece/wig to the crown of the head with the wrong side up. Then pin the strands of hair down. Position it the way you want it, and then sew or glue down each strand to the head.

Then, attach the head to the body with the long tail you left after crocheting the sweater.
Sew the "sweater ribbing" to the sweater in the row where the color changes in each stitch. As I mentioned above, this part is optional, but it gave my Sadness amigurumi a nice finished look.

Eyeglasses
For the eyeglasses, I used some wire and a glue stick to shape the circles. Cut a long piece of purple yarn. Then, use the yarn to tie a knot onto the wireframes and start wrapping!

Wrap the purple yarn around the wire to give the eyeglasses some color starting with the first circle, then the bridge of the glasses, then the second circle. The yarn will end at the bridge again. Use the ends of the yarn to secure the doll's face.

The Story Behind the Stitches
This little Sadness amigurumi was originally created because of my kids' love of collecting mystery bag figurines. After discovering the Pixar Minis collection, one of my daughters had her heart set on finding Sadness from Inside Out. The problem was that there was no guarantee we'd actually find her. Not to mention that the mystery bags weren't on clearance like the ones we'd bought before! So, just like my Forky amigurumi, I made one out of necessity.

As I worked on this little doll, though, I started thinking more about what Sadness represents in Inside Out. We spend so much of our lives being told to stay positive and push negative feelings aside, but the movie does such a beautiful job of showing that sadness has an important place in our lives too. Sometimes, allowing ourselves to feel sad can help us acknowledge what we're going through, ask for help, and connect with the people who care about us.

That message has always felt especially meaningful to me. I've had my own struggles, and crochet has been one of the creative outlets that has helped me through some difficult times. There's something calming about counting stitches and rows and focusing on creating something with my hands. When my mind felt overwhelmed, crochet gave me something else to focus on.
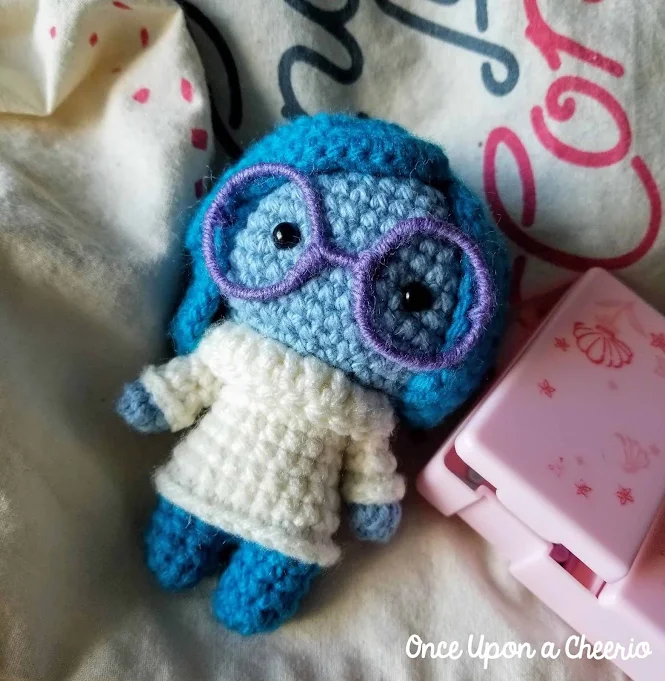
Crochet became especially important to me when my mom was unwell. I crocheted at home and by her bedside, always wanting to show her what I was making. Every stitch felt a little like a prayer for her to get better and for me to find the strength to get through everything. I'm so glad I continued crocheting after she passed away. Since she was the one who taught me how to crochet, picking up my hook still helps me feel connected to her, and I like to think she would be proud to see where this creative journey has taken me.

Creative Uses and Ideas
- Inside Out Amigurumi Collection: Crochet all of your favorite emotions to create a colorful Inside Out amigurumi collection.
- Disney Crochet Display: Add your finished Inside Out crochet dolls to a shelf or display alongside your favorite Disney and Pixar collectibles.
- Handmade Gift: Make a thoughtful gift for a friend or family member as a fun little reminder that all of our emotions are important and deserve to be acknowledged.
- Emotions and Feelings Activity: Use the different characters as a fun way to talk about emotions and help children recognize and express their feelings.
- Pretend Play: Add these emotion amigurumi dolls to a child's toy collection for imaginative play and to recreate favorite scenes from the movie Inside Out.
- Emotional Reminder: Keep this tiny crochet doll on your desk or workspace as a reminder that every emotion has an important place in our lives.
- Handmade Birthday Gift: Crochet Sadness makes a unique birthday gift for anyone who loves Disney movies, Pixar characters, or amigurumi.
- Therapy and Counselling: Crochet the complete set of Inside Out emotion dolls to use as a visual aid during counseling or therapy sessions, giving children a fun and familiar way to identify and talk about feelings.
More Inside Out Crochet Patterns to Love...


Share Your Creation with Me!
Did you make this project? I'd love to see it! Please share it with me on Instagram and/or use the #onceuponacheerio hashtag.
What's Next?
📌 PIN THIS POST to your Pinterest board so you can come back to it later!
💬 LEAVE A COMMENT; I’d love to hear from you!
🔗 ADD THIS PATTERN to your Ravelry queue or favorites!
👋 FOLLOW ME on Instagram and Facebook so you don’t miss a thing!
This is an original crochet pattern created by Juli Anne of Once Upon a Cheerio. Please do not claim this crochet pattern as your own. If you would like to share this pattern, please link to this blog post rather than reposting it on your own website. You may save or keep a copy for personal use only. Selling, redistributing, or sharing this crochet pattern, in whole or in part, is strictly prohibited.
Disclaimer: This crochet pattern is an unofficial fan-created design and is not affiliated with or endorsed by the respective copyright and trademark holders. All character names, images, and related intellectual property belong to their respective owners. This crochet pattern does not grant permission to reproduce, sell, or distribute copyrighted characters or related designs.

Hello! by any chance do you have a video guild for this amigurumi? im having a bit if a trouble at the hair part
I don't have a video, unfortunately. Which part are you having trouble with? Maybe I can try to help explain it? You can also try looking at this blog post to see if it helps:
https://www.onceuponacheerio.com/2020/06/amigurumi-hair-side-braid-crochet-tutorial.html
I think the body row 9 the count is off. It should be "3 Single Crochets, Decrease, 9 Single Crochets, Decrease, 6 Single Crochets (20)" instead of the current "3 Single Crochets, Decrease, 10 Single Crochets, Decrease, 7 Single Crochets (20)"
Oh you're right! Thank you so much! I'll make that change :)
Hi! I’m having a bit of trouble attaching the hair… I followed the pattern to a T, but my head turned out a bit big… I’m wondering if it’s just the different in yarn between the blues… Anyways, I’m going to try to make a smaller circle for the head, but when it comes time to attach the hair, how do you position the strands? For example, do you line up the center of the hair magic ring exactly with the center of the head magic ring? Also, where does strand 1 end up; which strands did you use for the bang? Thanks!
Hello! Great question! The second and third strands of the hair is actually the side swept ones, and then the third strand sits on Sadness' right side. Remember to use the "underside" or the "wrong side" of the crochet as the side that's going to show face up. The center of the circle of the wig lines up with the center of the head magic ring as you suspect.
Ho in the body part what does 6sc around the first arm mean? How to do that
Hi! What size is the doll?
Hello! The Sadness amigurumi doll is approximately 12 cm when made using worsted weight yarn. :)
Instead of crocheting the next stitch into the body, crochet the next stitch in one of the arms you previously made to attach the arms without sewing them onto the doll.
Hi,
I started to crochet the doll and I'm about to finish the head, but I don't know how to do it. The last row is 12 sts, but I don't know if I have to close the opening or leave it open, and if I have to make a knot and cut the yarn or leave a tail...
To understand better I read the instructions for the sweater, but I don't understand the end either. It says to fold the last round (so the tail will be on the outside) and to leave a long tail to sew the head onto the body... It don't make sense to me... How can I sew the sweater to the body with a tail that out of the outside of the sweater... I must have missed something...
It would be awesome if you could help me.
Hi Pauline, after folding down the neck of the sweater to create a turtle neck, I just sewed the head directly onto the sweater. I did not match the last round of 12 stitches to the sweater. I hope that helps!
Thanks,
Did you close the head or did you leave it open with the 12 stitches and cut the yarn ? And for the sweater, I suppose you cut the yarn and took another piece of yarn to sew it into the head ? AmnI right ?
Hi Pauline, I left it open at 12 stitches as the head is going to be sewn onto the neck of the sweater. It doesn't match stitch for stitch (obviously) but that's OK, can position the head how you would like.
Post a Comment