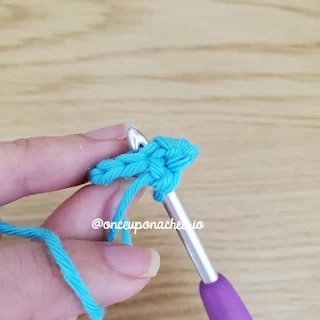
If you've been crocheting amigurumi for a while, you've probably heard of invisible decrease. But did you know there's such a thing as an invisible increase too?
While increases are usually less noticeable than decrease, traditional increases can still create visible gaps, especially when you're wokring with tight stitches or using a contrasting color. Invisible increase is a simple trick that gives your work a cleaner, more polished look, especially important for projects like stuffed animals, dolls, or anything worked in the round.
What is an Invisible Increase?
A standard single crochet increase usually involves making two single crochet (sc) stitches into the same stitch. While that's totally fine, it can stretch the stitch and leavea. bit of a gap.
The invisible increase technique still works two crochet stitches into the same stitch, but we change it up by working one of them in the back loop before working the second stitch in both of the loops.
 |
| Regular Single Crochet Increase |
 |
| Invisible Single Crochet Increase |
This technique would also work if you choose to work the first crochet stitch in the back loop and then work the second stitch into both of the loops.
This helps distribute the stitches by putting one in front of the other, making it look more like one stitch.
This method will come in handy when you want the increase to be less visible. However, it will appear different on the wrong side of the fabric as compared to the traditional increase.
How to Single Crochet Invisible Increase
 |
| Step 1. Insert the hook into the front loop of the stitch. |
 |
| Step 2. Make a crochet stitch in the front loop only. |
 |
| Step 3. Insert the hook into both loops of the stitch. |
 |
| Step 4. Make a crochet stitch into both the front and the back loops. |
When to Use an Invisible Increase
Use this technique any time you want a smoother, less noticeable shaping in your crochet, especially in:
- Amigurumi heads and bodies
- Stuffed limbs
- Spherical shapes or toys with curved surfaces
It's not always necessary, but it adds a subtle level of refinement that makes your work look extra tidy, especially when you're photographing it for a blog or listing it for sale!
Bonus Tip
- Keep your tension even: Invisible increases look best when your stitches are consistent in size.
- Use a stitch marker: Especially helpful when you're working in spirals and don't want to lose track of where the increase happened. Learn how to use a running stitch marker.
- Pair it with the invisible decrease: Using both techniques will give your amigurumi a smooth, seamless finish from top to bottom.
You Might Also Like...
- How to Single Crochet Decrease (and Invisible Decrease): Make your decreases blend in beautifully with this invisible sc2tog technique.
- How to Invisible Fasten Off in Crochet: End your crochet projects with a clean, seamless finish that blends right in.
- How to Yarn Under in Single Crochet: A simple tweak that tightens your stitches and gives your amigurumi a neater look.
Share Your Creation with Me!
What are you currently working on? I'd love to see it! Please share it with me on Instagram and/or use the #onceuponacheerio hashtag.
What's Next?
📌 PIN THIS POST to your Pinterest board so you can come back to it later!
💬 LEAVE A COMMENT, I’d love to hear from you!
🔗 ADD MY PATTERNS to your Ravelry queue or favorites!
👋 FOLLOW ME on Instagram and Facebook so you don’t miss a thing!
This is an original crochet tutorial written by Juli Anne of Once Upon a Cheerio. Please do not claim this crochet tutorial as your own. If you wish to share this crochet tutorial, you may link to this blog post, but please do not reprint it on your site. You may keep a copy for personal use, but please DO NOT sell or distribute the crochet tutorial.


Post a Comment