

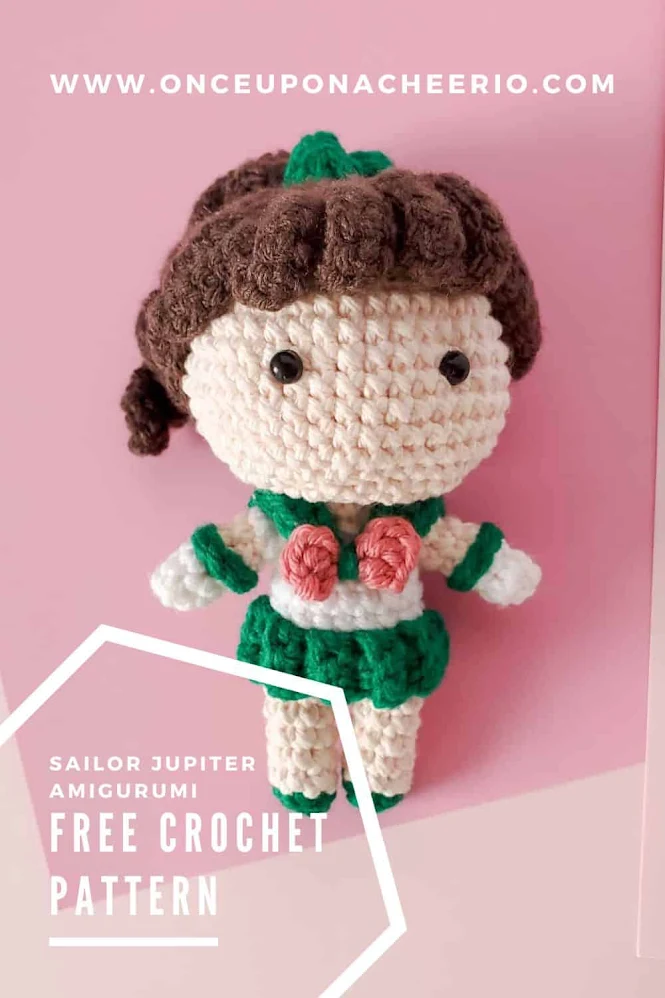
Bring one of the strongest members of the Sailor Scouts to life with this adorable Sailor Jupiter amigurumi doll!

Strong, kind, and always ready to throw down when her friends are in trouble, Sailor Jupiter is the powerhouse of the Sailor Scouts! Also known as Makoto Kino, she's known for her athletic ability, love of cooking and baking, and her soft spot for all things romantic.
Inspired by the beloved Sailor Moon character, this free crochet pattern captures her signature look, from her brown ponytail and green sailor uniform to the little details that make her instantly recognizable. Whether you're crocheting a handmade gift for a Sailor Moon fan or building your own anime amigurumi collection, this little doll is a fun project to make.
What You Need / Materials
This post contains affiliate links. Purchasing items through these links will not incur any additional costs for you. Please refer to our disclosure policy for more information.
- Worsted (weight #4) yarn in the following colors:
- Peach (I used Lily Sugar N' Cream Scents in Chamomile)
- Green (try using Brava Worsted in Grass)
- White (try using Brava Worsted in White)
- Pink (try using Brava Worsted in Cotton Candy)
- Brown (try using Brava Worsted in Sienna)
- 3.0 mm Crochet Hook
- Safety Eyes (I used 6.0 mm)
- Poly-fil or any Polyester Stuffing of your choice
- Yarn Needle
- Stitch Markers
- Scissors
Yarns Substitutions
- Hobbii Friends Cotton 8/8 (100% cotton; 82 yards / 75 m per 1.76 oz. / 50 g skein)
- Paintbox Yarns Cotton Aran (100% cotton; 93 yds / 85 m per 50g / 1.76 oz skein)
- Scheepjes Cahlista (100% natural cotton; 85 m per 50 g skein)
Finished Size
- Finished amigurumi measures approximately 12 cm (4.7 inches) in height.
- Consider using a different yarn weight/category and the appropriate hook size to make this project larger or smaller.
Level of Difficulty
- ★★★☆☆ Beginner / Easy
- Requires familiarity with stitches used (below), attaching plastic safety eyes, changing yarn colors, and basic sewing and embroidery skills.
Stitches & Abbreviations
- st/sts - stitch/stitches
- ch - chain
- slst - slip stitch
- sc - single crochet (using the yarn under method)
- sc inc - single crochet increase, 2 single crochets in one stitch
- sc dec - single crochet decrease, single crochet 2 stitches together
- hdc - half double crochet
- BLO - back loops only
- bbl - bobble stitch
- Yarn over and insert the hook into the next stitch. Yarn over and pull through. Yarn over and pull through 2 loops. Repeat until you have 6 loops on the hook. Yarn over and pull through all of the loops on the hook. Push the bobble stitch forward towards you when you sc into the next stitch.
Pattern Notes
- This pattern is written using US crochet terms.
- Complete the pieces in the specified order to ensure proper assembly later.
- I used the underside of the amigurumi hairpiece as the visible side, allowing the strands to naturally curl towards the face.
- Use the yarn under single crochet technique to achieve tighter, more aligned stitches.
- Learn how to seamlessly change color in crochet mid-row or round to create clean color transitions.
- Crochet in continuous spiral rounds. Do not join at the end of each round unless otherwise stated.
- Use a running stitch marker to keep your place when crocheting in rounds.
- Use the ultimate finish to neatly close up your amigurumi pieces.
- Use the invisible fasten-off method to create a smooth, knot-free edge that blends perfectly with your stitches.
- Optional: Use the invisible decrease to enhance the appearance of your amigurumi.
- Optional: Use the half-color change technique for clean color transitions between rounds.
Free Sailor Jupiter Crochet Doll Pattern
Head
Using a 3.0 mm crochet hook with peach yarn...
Round 1: Magic Circle with a base of 6 sc (6 sts)
Round 2: Sc inc in each st around (12 sts)
Round 3: [Sc, sc inc] x 6 times (18 sts)
Round 4: [Sc, sc inc, sc] x 6 times (24 sts)
Round 5: [3 sc, sc inc] x 6 times (30 sts)
Round 6: [2 sc, sc inc, 2 sc] x 6 times (36 sts)
Round 7: [5 sc, sc inc] x 6 times (42 sts)
Round 8-14: Sc in each st around (42 sts)
Round 15: [5 sc, sc dec] x 6 times (36 sts)
Round 16: [2 sc, sc dec, 2 sc] x 6 times (30 sts)
Round 17: [3 sc, sc dec] x 6 times (24 sts)
Insert safety eyes between rounds 10 and 11, about 7 stitches apart. Stuff the amigurumi doll head with polyester stuffing as you decrease.
Round 18: [Sc, sc dec, sc] x 6 times (18 sts)
Round 19: [Sc, sc dec] x 6 times (12 sts)
Round 20: Sc BLO in each st around (12 sts)
Round 21-23: Sc in each st around (12 sts)
Cut and fasten off. Stuff firmly and push rounds 20-23 inside the head to create a tunnel and a hole for the neck to go into later.
Arms (make 2)
Using a 3.0 mm crochet hook with white yarn...
Round 1: Magic Ring with a base of 6 sc (6 sts)
Round 2-3: Sc in each st around (6 sts)
Change to peach yarn...
Round 4-5: Sc in each st around (6 sts)
Cut and fasten off.
Legs and Body
Using a 3.0 mm crochet hook with green yarn...
Round 1: Magic Ring with a base of 6 sc (6 sts)
Round 2: [2 Sc, sc inc] x 2 times (8 sts)
Change to peach yarn...
Round 3-7: Sc in each st around (8 sts)
Cut and fasten off the first leg.
Repeat rounds 1-7 to make a second leg. Do not cut or fasten off; change to white yarn at the last st and finish off with a Ch 2.
Round 8: Join the second leg with the first leg. 8 sc around the first leg, 2 sc along the ch, 8 sc around the second leg, 2 sc along the other side of the ch (20)
Round 9-10: Sc in each st around (20 sts)
Round 11: Sc BLO in each st around (20 sts)
Round 12: Sc in each st around (20)
Round 13: 4 sc, 6 sc around the first arm, 10 sc, 6 sc around the second arm, 6 sc (32 sts)
Round 14: Sc dec in each st around (16 sts)
Stuff the amigurumi doll body with polyester stuffing as you decrease.
Change to peach yarn...
Round 15: Sc dec in each st around (8 sts)
Round 16-20: Sc in each st around (8 sts)
Cut and leave a long tail to attach the body to the head by threading the yarn tail through the hole on the bottom of the head. Sew it to the top of the head, then sew it to the neck again to secure it. Do this a few times to make sure your head is secured.
Skirt
Using a 3.0 mm crochet hook and green yarn...
Row 1: Ch 4, sc into the second st from the hook, sc down the ch (3 sts)
Rows 2-20: Ch 1, turn, sc BLO in each st across (3 sts)
Close off the skirt and then attach it to the body of the doll around round 11 on the body.
Bandana
Using a 3.0 mm crochet hook and green yarn...
Row 1: Ch 18, slst into the second ch from the hook, slst, sc, 3 hdc, [3 dc in one st], 3 dc, [3 dc in one st], 3 hdc, sc, 2 slst (21 sts)
Cut and fasten with a tail to sew onto the body. The bandana should rest on the shoulders of the doll.
Front & Back Bow (make 2)
Using a 3.0 mm crochet hook and pink yarn...
Row 1: Ch 4, dc into the third st from the hook, dc (2 sts)
...without cutting or turning, repeat Row 1
Hairpiece / Wig
Using a 3.0 mm crochet hook and brown yarn...
Round 1: Magic Circle with a base of 6 sc (6 sts)
Round 2: Sc inc in each st around (12 sts)
Round 3: [Sc, sc inc] x 6 times (18 sts)
Round 4: [Sc, sc inc, sc] x6 times (24 sts)
Round 5: [3 sc, sc inc] x 6 times (30 sts)
Fringe
Strand 1-4: Ch 9, sc into the 2nd ch from the hook and up the ch, then slst into the next st on round 5 (8 sts)
Right Side of Hair
Strand 5: Ch 9, sc into the 2nd ch from the hook and up the ch, then slst into the next st on round 5 (8 sts)
Strand 6: Ch 9, sc into the 2nd ch from the hook, hdc up the ch, skip 1, then slst into the next st on round 5 (8 sts)
Strand 7: Ch 10, hdc into the 3rd ch from the hook and up the ch, skip 1, then slst into the next st on round 5 (8 sts)
Strand 8: Ch 12, hdc into the 3rd ch from the hook and up the ch, skip 1, then slst into the next st on round 5 (10 sts)
Back of Hair
Strand 9-14: Ch 14, hdc into the 3rd ch from the hook and up the ch, skip 1, then slst into the next st on round 5 (12 sts)
Left Side of Hair
Strand 15: Repeat strand 8
Strand 16: Repeat strand 7
Strand 17: Repeat strand 6
Strand 18: Repeat strand 5
Cut and fasten off with a long strand to sew the hairpiece onto the head. Alternatively, you can use some heavy-duty glue to fix it onto the head.
Ponytail
Using a 3.0 mm crochet hook and brown yarn...
Strand 1: Ch 31, sc into the 2nd ch from the hook, sc in the next 9 ch, hdc into remaining ch (30 sts)
Strand 2-3: Repeat 1
Strand 4: Ch 21, sc into the 2nd ch from the hook, sc in the next 9 ch, hdc into the remaining ch (20 sts)
Cut and fasten off, pinching the top of the 3 strands together. Leave a tail long enough to sew to the rest of the hairpiece.
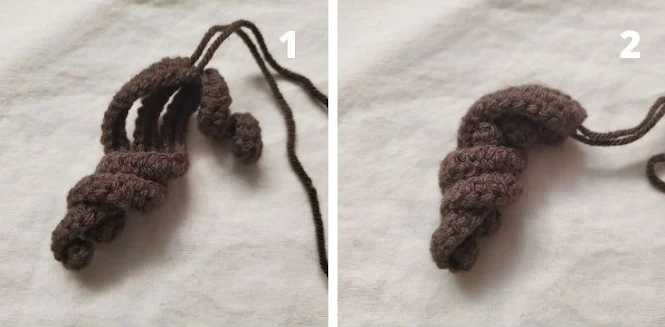
There are 3 long strands and 1 short strand. After twisting the 3 long strands together counter-clockwise, you'll notice that there's a bit of a gap at the top of the ponytail. Twist the short strand in the same direction and tuck it into the top of the ponytail to give it a bit more volume.

Hair Tie
Using a 3.0 mm crochet hook and green yarn...
First Bead: Ch 4, bbl st into the 3rd ch from the hook, then without cutting/fastening, ch 4, bbl st into the 3rd ch from the hook. Now you have two bbl stitches; slst into the very first ch you made to make one pompom.
Second Bead: Repeat the steps for the first pompom to make the second one.
Finishing Touches
Using a 3.0 mm crochet hook and green yarn...
Ch 7, cut, and sew it onto the ends of the doll's gloves.
Do this for both arms.
The Story Behind the Stitches
After creating the Sailor Venus amigurumi doll, I thought Sailor Moon would be the next Sailor Scout on my crochet list. But my daughter had a different idea. She specifically requested Sailor Jupiter! And she wasn't just interested in the doll itself. She was especially excited about the little pompom hair tie that holds Jupiter's signature ponytail together.

Sailor Jupiter is actually a special character for me, too. Her first appearance was the very first Sailor Moon episode I ever watched, and she quickly became my first favorite Sailor Scout. There's something to love about each of the Scouts, but I especially admired Jupiter's tough and independent personality. She's not afraid to stand up for herself or her friends, and she's more than capable of taking care of herself.
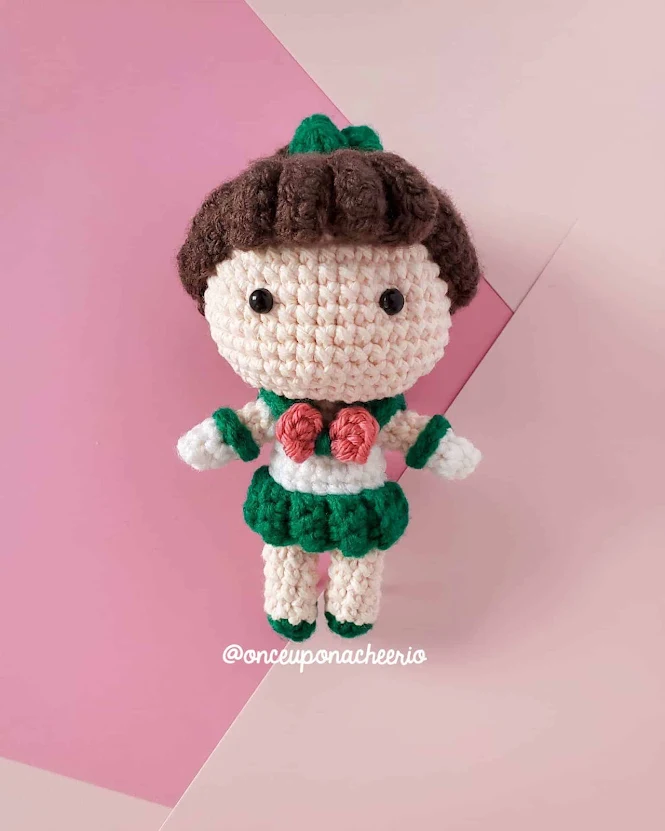
I also love that there's more to Makoto Kino than her tough exterior. After losing her parents at a young age, she had to become independent and learn to do many things for herself. She's incredibly capable, especially when it comes to cooking and other domestic skills, but that doesn't mean she's all tough all the time. She has a caring and gentle side, loves her friends, and can still get swept up in crushes and romance like any other teenager.

I think that combination of strength and softness is what makes Sailor Jupiter such a memorable character, and it was a lot of fun trying to capture a little bit of that personality in this tiny crochet doll.
Creative Uses and Ideas
- Sailor Moon Collection: Crochet the entire collection of Sailor Scouts and create your own tiny team of Pretty Guardians.
- Collector's Display: Crochet the remaining Sailor Scouts and create an adorable mini Sailor Moon amigurumi collection.
- Handmade Gift: Make a personalized Sailor Venus doll for a fellow Sailor Moon fan or anime-loving friend.
- Bag Charm: Attach the doll securely to a bag or backpack to take your favorite Sailor Scout along wherever you go.
- Keychain: Turn this small amigurumi doll into a fun handmade keychain for Sailor Moon fans.
- Stocking Stuffer: Make this amigurumi doll as a handmade surprise for birthdays, holidays, or other special occasions.
More Sailor Moon Crochet Patterns


Share Your Creation with Me!
Did you make this project? I'd love to see it! Please share it with me on Instagram and/or use the #onceuponacheerio hashtag.
What's Next?
📌 PIN THIS POST to your Pinterest board so you can come back to it later!
💬 LEAVE A COMMENT; I’d love to hear from you!
🔗 ADD THIS PATTERN to your Ravelry queue or favorites!
👋 FOLLOW ME on Instagram and Facebook so you don’t miss a thing!
This is an original crochet pattern created by Juli Anne of Once Upon a Cheerio. Please do not claim this crochet pattern as your own. If you would like to share this pattern, please link to this blog post rather than reposting it on your own website. You may save or keep a copy for personal use only. Selling, redistributing, or sharing this crochet pattern, in whole or in part, is strictly prohibited.
Disclaimer: This crochet pattern is an unofficial fan-created design and is not affiliated with or endorsed by the respective copyright and trademark holders. All character names, images, and related intellectual property belong to their respective owners. This crochet pattern does not grant permission to reproduce, sell, or distribute copyrighted characters or related designs.

Post a Comment