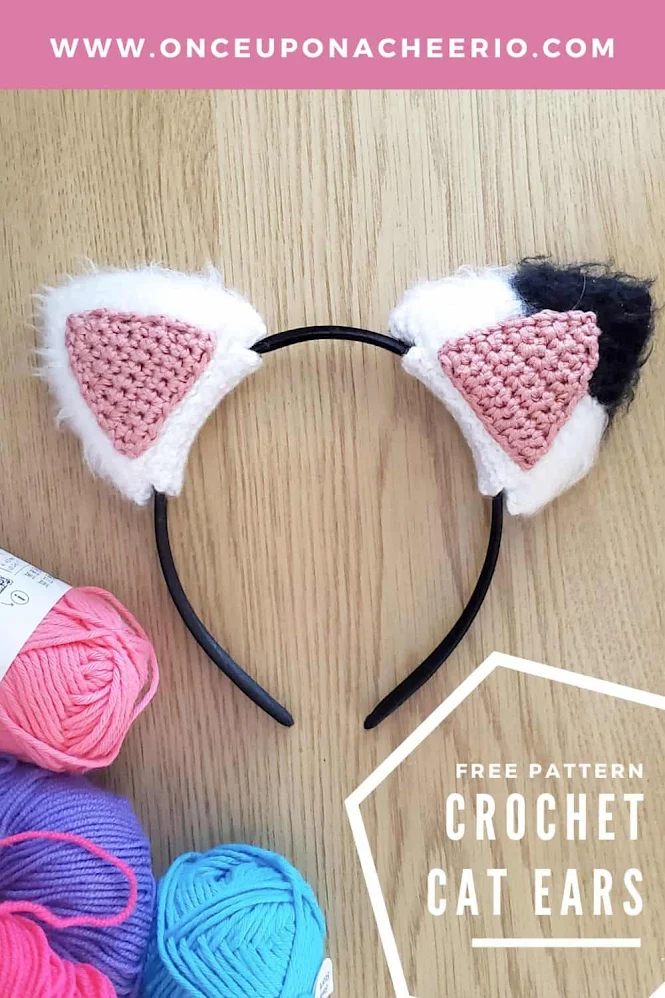
Looking for a cute costume accessory that doesn't require glue, sewing, or a trip to the store? These removable crochet cat ears are a quick and fun project that slide right onto a headband. No commitment required!

I love a crochet project that's both playful and practical, and these cat ears check all the boxes. Whether you're making them for a dress-up, Halloween, or just because, they're designed to be completely removable and reusable. Instead of permanently attaching them to a headband, I came up with a clever sleeve that lets you slip them on and off whenever you want.
They're quick and easy to whip up, easy to customize, and perfect for kids, costumes, or your next craft fair table. If you've got a headband and some yarn, you're halfway there.
What You Need / Materials
This post contains affiliate links. Purchasing items through these links will not incur any additional costs for you. Please refer to our disclosure policy for more information.
- Worsted Weight Yarn in the following colors:
- Black (try using Brava Worsted in Black)
- White (try using Brava Worsted in White)
- Pink (try using Brava Worsted in Cotton Candy)
- 4.0 mm crochet hook
- Poly-fil or any Polyester Stuffing of your choice
- 1.5 cm wide Headband
- Slicker Brush (optional)
- Yarn Needle
- Stitch Markers
- Scissors
Finished Size
Finished crochet ears measure approximately 7.5 cm (3 inches) in height.Level of Difficulty
- ★☆☆☆☆ Beginner / Easy
- Requires familiarity with stitches used (below), changing yarn colors, and basic sewing skills.
Stitches & Abbreviations
- st/sts - stitch/stitches
- ch - chain
- sc - single crochet (using the yarn under method)
- sc inc - single crochet increase, 2 single crochets in one stitch
- FLO - front loop only
- BLO - back loop only

Pattern Notes
- This pattern is written using US crochet terms.
- I made these crochet cat ears using the "Yarn Under Single Crochet" technique. This technique makes the stitches tighter and appears more aligned.
- I also used a half-color changing technique to achieve cleaner lines when changing colors from one row to another.
- Learn how to seamlessly change color in crochet mid-row or round to create clean color transitions.
- These cat ears are made to be removable, so you can reuse your headband!
Crochet Cat Ears Pattern
Left Ear
Using a 4.0 mm crochet hook and black yarn...
Round 1: Magic Ring with a base of 4 sc (4 sts)
Round 2: Sc inc in each st around (8 sts)
Round 3: [Sc, sc inc] x 4 times (12 sts)
Round 4: [3 sc, sc inc] x 3 times (15 sts)
Round 5: [2 sc, sc inc, 2 sc] x 3 times (18 sts)
Round 6: [5 sc, sc inc] x 3 times (21 sts)
Round 7: [3 sc, sc inc, 3 sc] x 4 times (24 sts)
Round 8: [7 sc, sc inc] x 3 times (27 sts)
Change to white yarn...
Round 9: Sc in each st around (27 sts)
Round 10: [4 sc, sc inc, 4sc] x 3 times (30 sts)
Round 11: [9 sc, sc inc] x 3 times (33 sts)
Round 12: Sc in each st around (33 sts)
Round 13: [5 sc, sc inc, 5 sc] x 3 times (36 sts)
Round 14: [11 sc, sc inc] x 3 times (39 sts)
Round 15: Sc in each st around (35 sts)
Round 16: [6 sc, sc inc, 6 sc] x 3 times (42 sts)
Cut and fasten off with a long tail. Stuff the ear with polyester stuffing and use the tail to sew the bottom of the ears.

Right Ear
Using a 4.0 mm crochet hook and white yarn...
Repeat the pattern that made the left ear without the color change.
Pink Inner Ear (make 2)
Using a 4.0 mm crochet hook and pink yarn...
Row 1: Magic Ring with a base of 2 sts (2 sts)
Row 2: Ch 1, turn, sc inc in each st across (4 sts)
Row 3: Ch 1, turn, sc in each st across (4 sts)
Row 4: Ch 1, turn, sc inc, 2 sc, sc inc (6 sts)
Row 5: Ch 1, turn, sc in each st across (6 sts)
Row 6: Ch 1, turn, sc inc, 4 sc, sc inc (8 sts)
Row 7: Ch 1, turn, sc in each st across (8 sts)
Row 8: Ch 1, turn, sc inc, 6 sc, sc inc (10 sts)
Row 9: Ch 1, turn, sc in each st across (10 sts)
Row 10: Ch 1, turn, sc inc, 8 sc, sc inc (12 sts)
Row 11: Ch 1, turn sc in each st across (12 sts)
Cut and fasten off with a long tail to sew onto the ears.

Base
Row 1: Ch 16, sc into the second ch from the hook, sc in each st across (15 sts)
Row 2: Sc into the FLO of each st across (15 sts)
Row 3: Sc into the BLO of each st across (15 sts)
Cut and fasten off with a long tail to sew onto the bottom of the ears.

Assembly
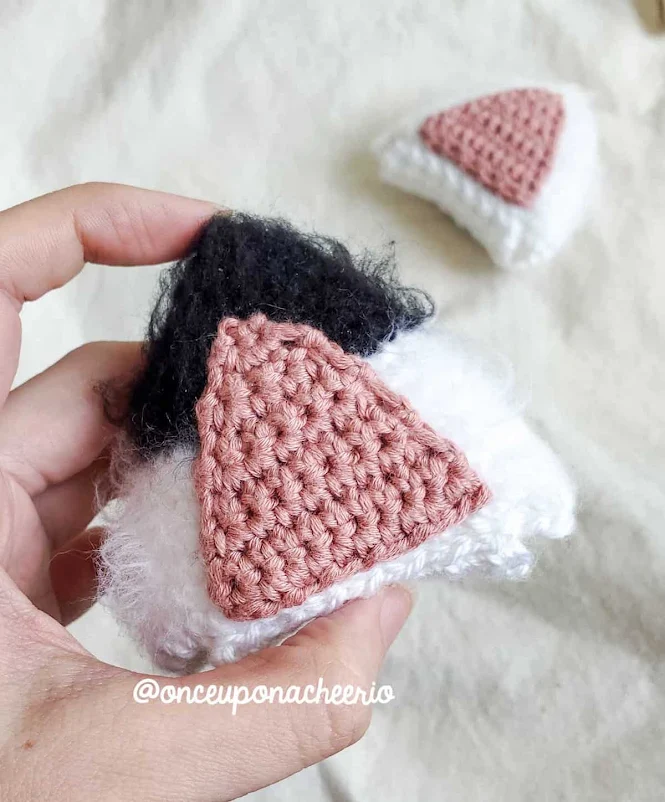
Stuff the triangle ears with some poly-fil and then use the ends of the yarn to sew up the bottom so they don't come out. If you want fluffy ears, you can use a slicker brush to brush them out like I did with the Red Panda/Fox ears that I made not too long ago.
Then use the ends of the pink inner ear and sew it to the triangle ears.
Attach the base sleeve/attachment rectangular piece for the bottom of the ears.
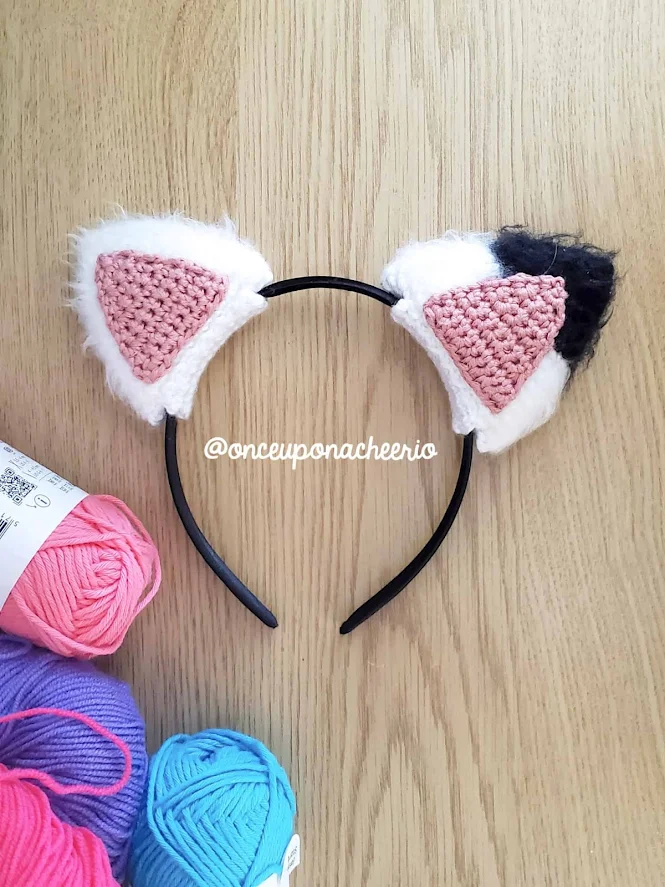
Feed the headband through the base sleeve/attachment. I only had black headbands at home at the time of making Gabby's cat ears, but in the show, the headband is white. So if you want to stay true to the show, use white headbands!

If all is attached properly, the crochet cat ears will sit on the headband with no need for additional glue. And in the future when they grow out of the show, you can remove those cat ears and re-use the headbands!

Did you crochet your own Gabby Cat Ears? I'd love to see it! Please share it with me on Instagram and/or use the #onceuponacheerio hashtag.
Inspiration Behind the Crochet Design / Why I Made This
My girls have been obsessed with Gabby's Dollhouse, and if you have little ones, you probably know exactly what I'm talking about. The show is bursting with charm, color, fun characters, and creativity. It didn't take long before they were asking for their own set of cat ears like Gabby's.

I loved the idea of creating a fun accessory they could wear for pretend play. dress-up, or even Halloween. But I didn't want to glue anything permanently or ruin a perfectly good headband they already had. That's when I came up with the idea of removable cat ears.

These crochet cat ears are designed to slide right onto a standard headband. No glue or sewing onto the headband required. They can be easily removed or replaced with something new. It's a playful project that's as practical as it is cute.
Creative Uses and Ideas
- Costume accessory: Complete a simple cat ears costume without glue or sewing.
- Dress-up fun: Ideal for imaginative play and pretend adventures.
- Birthday party flair: Use as favors or props for a cat-themed celebration.
- Photo booth prop: Add some playful charm to party snapshots
- Customizable accessory: Embellish with bows, bells, or sparkly yarn.
- Versatile design base: Modify the shape to create other animal ears, too.
You Might Also Like...
- Fluffy Crochet Fox or Red Panda Ears: Make a bold statement wtih these super fluffy animal ears.
- Crochet Leaf Sprout Headphone Accessory: A quick and quirky make that adds personality to any pair of headphones.
- Crochet Ghost Walking Dog Amigurumi: A spooky-cute Halloween pattern that's sure to charm.
Share Your Creation with Me!
Did you make this project? I'd love to see it! Please share it with me on Instagram and/or use the #onceuponacheerio hashtag.
What's Next?
📌 PIN THIS POST to your Pinterest board so you can come back to it later!
💬 LEAVE A COMMENT, I’d love to hear from you!
🔗 ADD THIS PATTERN to your Ravelry queue or favorites!
👋 FOLLOW ME on Instagram and Facebook so you don’t miss a thing!
This is an original crochet pattern written by Juli Anne of Once Upon a Cheerio. Please do not claim this crochet pattern as your own. If you wish to share this crochet pattern, you may link to this blog post, but please do not reprint it on your site. You may keep a copy for personal use, but please DO NOT sell or distribute the crochet pattern.
You may sell products made from this crochet pattern, but please credit the design to Juli Anne of Once Upon a Cheerio, and provide a link to my blog www.OnceUponaCheerio.com. Permission is NOT granted for mass production or factory manufacturing of any kind. Thank you for understanding!


Post a Comment